How to treat wet rot in timber
How to Treat Wet Rot in Timber
Wet rot occurs when timber within a property becomes damp and moist, and can have a range of effects on the building from manageable to major loss of the structural integrity of the home. When caught early on, wet rot can be easier to repair than you might realise. However, if it is left unchecked for a longer period of time, wet rot can cause irreversible damage to the timber in your home and might require that the timber is completely replaced in order to ensure the property’s structural integrity. If you think that you may be dealing with wet rot in your house, it is important for the issue to be inspected and that repair work is carried out as soon as possible in order to ensure that the issue does not get any worse. Any property can suffer from wet rot regardless of whether it is an older property or a new build, and wet rot that is left to get worse over time can often lead to more serious problems such as mould or dry rot.
What is Wet Rot in Timber?
Wet rot is a fungus that attacks unprotected timber in a property after it has become moist or wet. Wherever there are suitable environmental conditions for wet rot, the rot can develop over time which can sometimes result in the breakdown of the structural integrity of the timber that has been affected. The timber decaying fungi can thrive in a range of environments that lead to damp timber such as leaks in the internal plumbing or penetrating damp problems that affect the timber. However, since there are several different species of wet rot, it can often become a problem to the homeowner who may be trying to determine the type of wet rot problem that is occurring in their property.
Wet rot will usually thrive in timber that has a moisture content somewhere between 25-50%. While wet rot can occur from a range of different causes, the most likely causes include rising damp; defective seals on bathroom fixtures such as baths and showers; defective plumbing in sinks and water-based appliances like dishwashers and washing machines; and defective roof coverings, masonry, and rainwater drainage systems like guttering. Wet rot can occur in any area of the property where damp is present and where the moisture has come into contact with the timber for a prolonged period of time. To ensure that the timbers are treated and repaired, or that any new timber that is installed after wet rot is maintained in a dry condition, it’s important to ensure that the root source of the moisture is identified and rectified.
Moisture is the main cause of all rot problems in timber. It is important to keep your property well-maintained and ensure that it is sealed from water and wind in order to reduce the risk of decay and rot developing in the timber. Bear in mind that your property can be affected by wet rot at any level. Some common external defects that can lead to wet rot occurring in your home include:
- Defects in the masonry pointing or render
- Defects in the gutters or downpipes
- Problems in the roof coverings or flashings
- Blocked or missing air bricks
- Raised path levels that can lead to a bridge of the damp proof course in your home and cause rising damp
- Drains that have become damaged or blocked due to debris
Wet rot that occurs in the upper floors and roof of your home is less common compared to wet rot in ground floor timber, due to the fact that ground floor woodwork is more likely to be in closer contact with damp soil areas and has the risk of rising damp. In addition, ground floor woodwork is less likely to be seen compared to upper floor timber. Some of the most common reasons for damp and water ingress in the upper floors of a property include:
- Slipped roof tiles which can allow water ingress and provide suitable conditions for both wet and dry rot to thrive if not dealt with quickly
- Wet stains or algae growth below the gutters, which can signify a leak
- Defective flashing around the chimney, which can result in water being able to enter your property over the long term, which may not appear as water staining on the ceilings or chimney breast for some time
- Overflow pipes protruding out of the walls in upstairs bathroom floors or central heating systems. It’s important to keep these in good condition and ensure that they are not dripping
Identifying Wet Rot
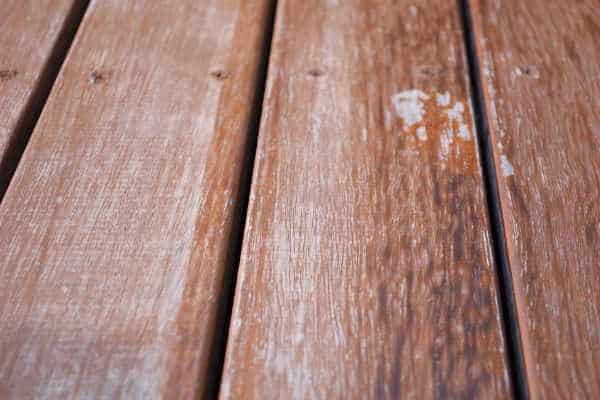
Wet rot has a specific life cycle. At the beginning, it will develop strands that feed off the woodwork causing the timber to shrink. It will then create a fruiting body which releases spores into the air. The timber will begin to change colour as a result of the presence of wet rot. Typically, the affected timber will appear darker, although it may appear lighter in some cases due to the environmental factors. Timber that has been affected by wet rot will most commonly appear spongy and softer to the touch.
Wet rot timber decay is usually localised to the specific area that has been impacted by the leak or water ingress. In most cases, clear signs of a wet rot problem will be seen on construction timber throughout the property like floorboards, skirting boards and windowsills since the paint will flake and appear damaged.
Another tell-tale sign that you are dealing with wet rot in the timber in your home is a musty smell that will be very obvious around the affected timber. However, one of the biggest issues when it comes to finding and identifying wet rot is that it will often affect timber in your property that is not always visible, such as behind the walls or underneath the flooring.
Is it Wet Rot or Dry Rot?
Understanding the main differences between the two types of timber rot will help you determine the cause of the problem in your home and find the best course of future treatment. While both wet rot and dry rot are caused by excess moisture in the wood, the fungus that affects the wood is different and dry rot is more susceptible to spreading. In fact, once dry rot has taken hold in your home, it’s often much harder to stop the spread compared to wet rot.
Wet Rot Signs
- Wood that feels spongy and weaker than it should
- Localised rot in an area that has been affected by a leak or water ingress
- Wood shrinkage and cracking in the event of advanced decay
Dry Rot Signs
- Obvious square-shaped cracks that appear along and across the wood
- Fungus that appears similar to white cotton wool when young and a greyish colour when older
- Red spore dust caused by the dry rot fruiting bodies
- Wood that is affected far from the source of damp or water ingress
How to Treat Wet Rot in Timber?
Treating a wet rot issue will be important as soon as possible after suspecting that your property may be suffering from this issue. The sooner you can identify and treat a wet rot issue, the easier it will be to rectify the problem. You should also determine the source of the excess moisture in the wood such as a leak or a damp problem to ensure that this is also repaired to prevent the wet rot from reoccurring.
If you have a rot problem with the timber in your home, it’s a good idea to arrange a damp and timber survey to help you find out more about the root of the problem and identify any other issues with damp and timber decay that might have affected your home. The survey will provide you with all the information that you need on the impact of the moisture content in your home and point you in the right direction when it comes to repairing the problem.
If wet rot is caught in its early stages, you can usually easily treat it by applying a wet rot hardening solution to the wood, which you can get from any good hardware store for a nominal price. The solution is usually brushed onto the wood and left to dry where it will penetrate into the wood and harden it. It is best to do this after allowing the affected wood to air dry for some time to reduce the moisture. You can do this by leaving the room well-ventilated and uncovering any wood that might normally be underneath floor coverings, for example. Once the wet rot hardening treatment has been left to dry, you can then fill and sand the wood if necessary. Be sure that you have dealt with the underlying issue causing the wet rot in the first place, since further leaks or water ingress will only cause the problem to reoccur.
Wet rot is a problem that can impact your home when there is moisture present from damp or a leak. While it can easily be treated when caught early, wet rot that is left to develop over time can cause structural issues in your home.
Damp Survey Costs
Transparent pricing with no hidden fees for our independent, unbiased surveys.

Level 1
What’s included:
- Inspection of walls
- Inspection of floors
- Inspection of ceilings
- Leak inspection of drains and plumbing
- Damp information and prevention guide

Level 2
What’s included:
- Everything in Level 1
- Dry rot inspection
- Wet rot inspection
- Woodworm inspection
- Damp information and prevention guide
Level 3 (Most Popular)
What’s included:
- Thermal Imaging
- Air humidity testing
- HD boroscope camera
- Brickwork pointing inspection
- DPC inspection
- Ventilation flow test on extractor fans
- 4K drone imagery roof, chimney stack
and guttering inspection - Structural condition inspection
- Inspection of walls
- Inspection of floors
- Inspection of ceilings
- Leak inspection of drains and plumbing
- Dry rot inspection
- Wet rot inspection
- Woodworm inspection
- Damp information and prevention guide
Survey Add Ons
Add On 1
Laboratory analysis Of plaster identifies hygroscopic salts such as chlorides and nitrates. which indicate whether damp is caused by rising groundwater or by plumbing leaks, This testing removes guesswork, allowing the exact source of moisture to be identified so the correct treatment is applied rather than carrying out unnecessary damp-proofing work.
Add On 2
qPCR DNA mould testing detects microscopic mould spores that are invisible during a normal inspection and van remain hidden behind walls, floors. or inside building rkaterials. It identifies the exact mould species present and the contamination level, allowing hidden mould problems to be confirrned and properly treated before they affect the property or occupants’ health.
Qualifications: All our surveyors are PCA and CSRT qualified for remedial treatments and also CSSW qualified for structural waterproofing.
Next day report: You will receive the report within 24 hours of the inspection taking place.
The survey fee will be deducted from the cost of any recommended repairs.
These are the tools we use
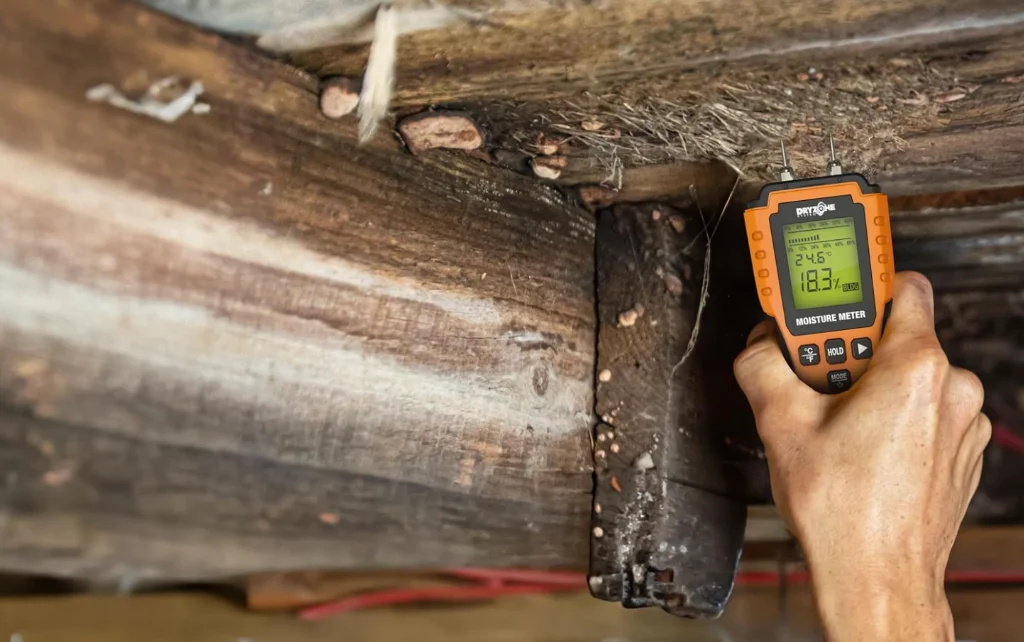
Damp Meter
A damp meter is a diagnostic tool used to detect and measure moisture levels within building materials such as plaster, brick, timber, and concrete.

Borescope camera
borescope camera is a small inspection camera attached to a flexible semi-rigid cable that allows you to see inside areas that are otherwise inaccessible.

Drone Inspection
A drone is a remotely operated aerial device equipped with a camera that allows visual inspection from above without the need for scaffolding or ladder.

Air Humidity Sensor
Air humidity sensor measures the amount of moisture present in the air, expressed as relative humidity (RH) in percentage. It helps determine whether indoor conditions are contributing to condensation, mould growth, or damp-related issues.

Thermal Imaging Camera
A thermal imaging camera detects temperature differences on surfaces by using infrared technology to produce a heat map image. In damp investigations, it helps identify cold spots, moisture intrusion, insulation defects, thermal bridging and leaks.
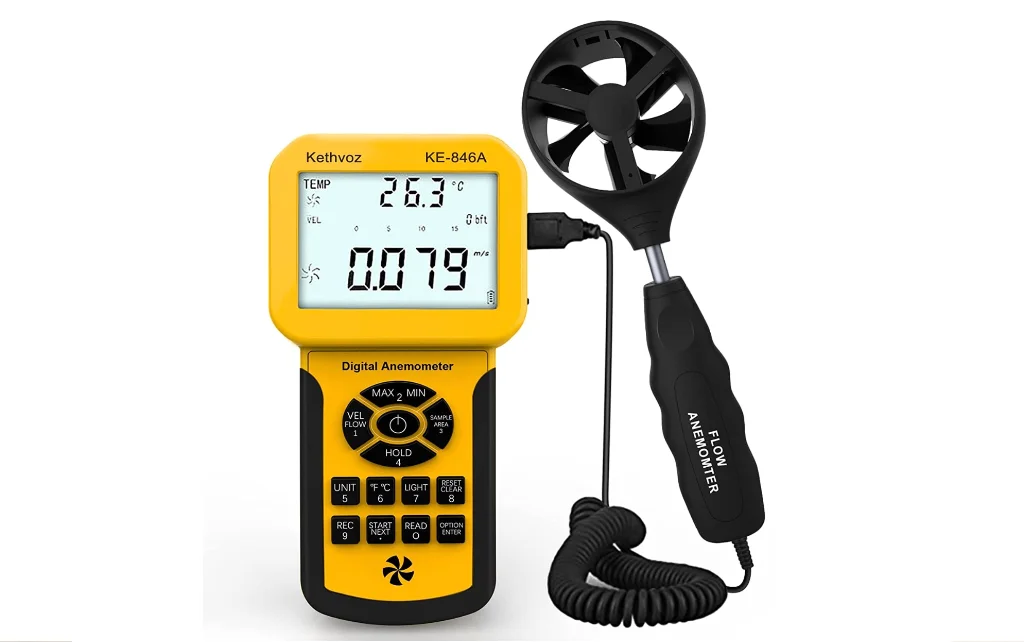
Air Flow Ventilation Detector
An air flow ventilation detector measures the movement and volume of air passing through vents, extractor fans, and air bricks. It confirms whether ventilation systems are working properly and achieving adequate air changes within a room. Poor airflow leads to trapped moisture, high humidity, condensation on cold surfaces, and ultimately mould growth.

Mould Lab Swab Testing
A mould swab test is carried out to confirm the presence of hidden mould growth and identify the specific species involved. Surface mould is not always visible, especially behind furniture, inside cavities, or within ventilation systems. Laboratory analysis of a swab sample determines whether active mould spores are present and what type they are, which helps assess potential health risks and decide the correct remediation approach rather than relying on visual assumption alone.

Lab Analysis of Plaster
Laboratory analysis of plaster is used to identify the type of salts present within the material, typically chlorides and nitrates. The presence and concentration of these salts help determine whether the moisture source is consistent with rising damp, ground contamination, or another forms [sic] of water ingress. such as mains water leak, This removes guesswork and prevents misdiagnosis, ensuring the correct remedial treatment is specified rather than applying unnecessary or ineffective solutions.
Contact Us
If you have some questions, please complete this form:
Book and Pay for a survey
If you are ready to book a survey and pay, please complete this form:

Contact Us
If you have some questions, please complete this form:
Book and Pay for a survey
If you are ready to book a survey and pay, please complete this form:
Contact Us
If you have some questions, please complete this form:
Book and Pay for a survey
If you are ready to book a survey and pay, please complete this form: